You may have seen this game on some Instagram filters: The blind color game.
Let’s recreate this game with JavaScript.
The rules:
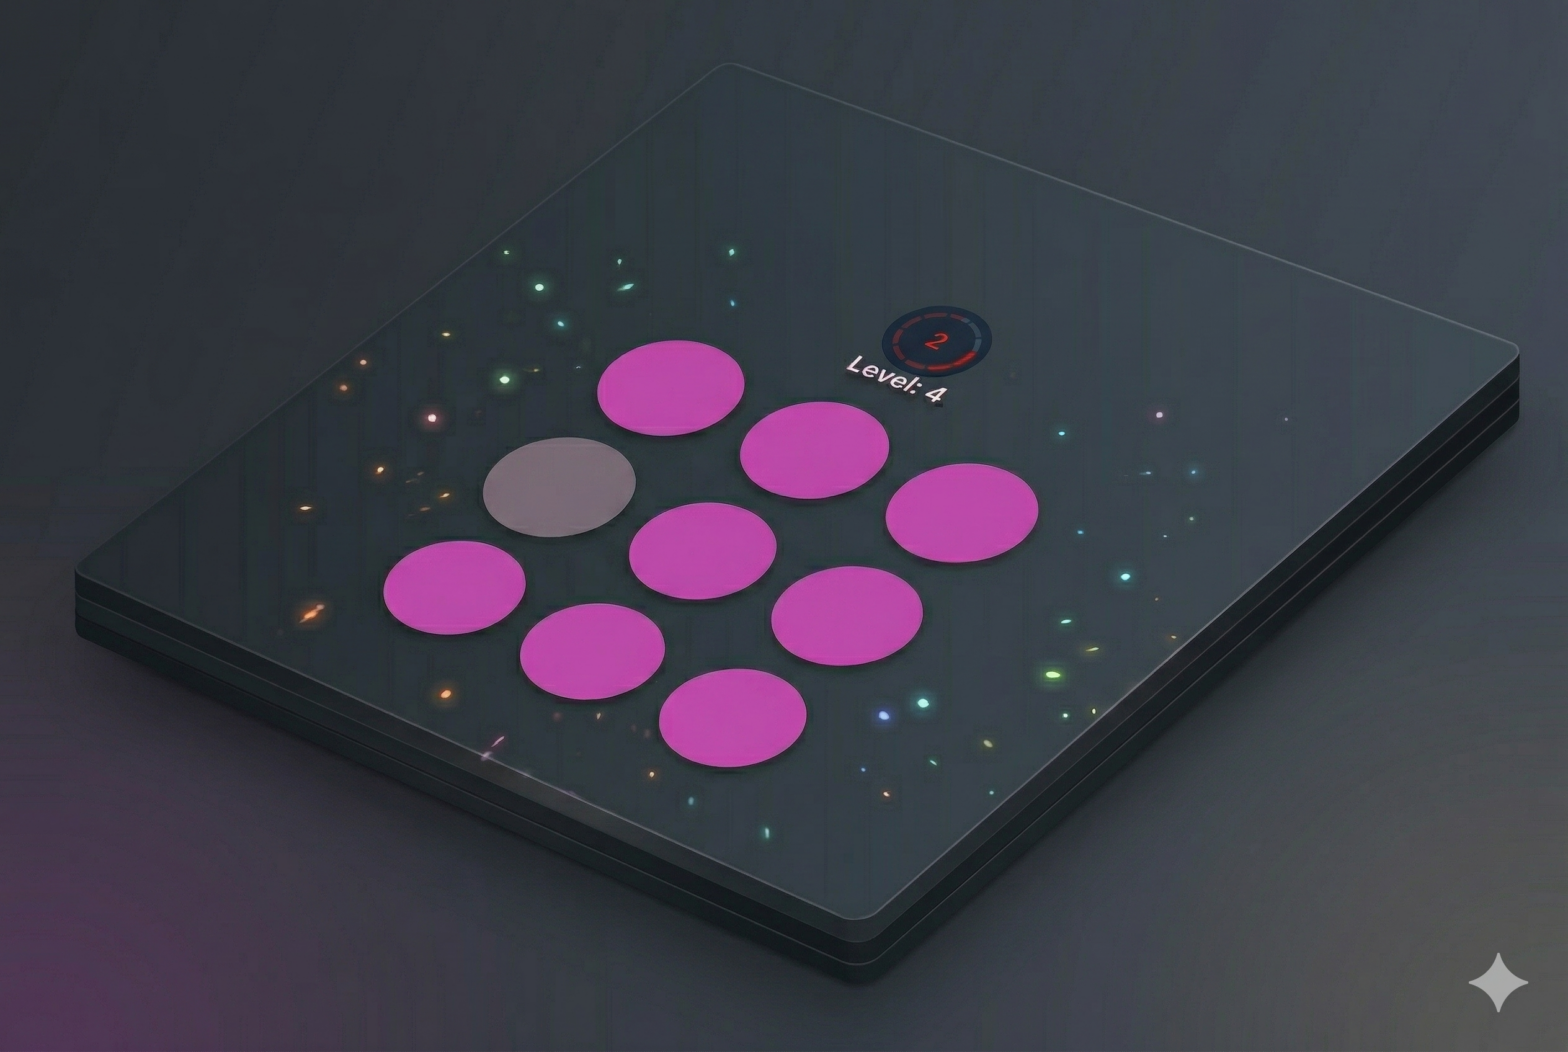
You have 9 circles filled with the same color, except for one, which is slightly darker (or lighter). Click on the wrong color to move to the next level.
On each level:
– the odd color becomes closer to the other ones, making it harder to see.
- Every few levels, we increase the color difficulty, add one more row and increase the number of circles.
- The player has only 10 seconds to answer. Each mistake removes 2 seconds from the timer (note, the timer tutorial is available here)
What we’ll learn in this project:
- Vanilla JavaScript
- JavaScript ES6 classes
- CSS variables
- CSS animations
Initialize the project
For this tutorial, you only need Node.js and NMP installed on your computer. To compile the project, I’ll use https://parceljs.org/ to keep the setup simple.
1/ Parcel Setup
First, create a folder named Color Game and initialize the Parcel setup:
npm install --save-dev parcelLet’s also add the SASS transformer
npm i --save-dev @parcel/transformer-sassThen inside the project, create a /src folder with an empty .html file. Here is the architecture of the project:
Blind Game/
├─ node_modules/
├─ src/
│  ├─ js/
│  │  ├─ index.js
│  ├─ scss/
│  │  ├─ style.scss
│  ├─ index.html
├─ package.json
Let’s also update or package.json to add the script to launch the Parcel project (find more on the parcel page):
{
    "name": "Color-Game ",
    "version": "1.0.0",
    "description": "A little javascript game",
    "scripts": {
        "start": "parcel src/index.html --open",
        "clean": "rm -rf dist/*",
        "build:parcel": "parcel build src/index.html --no-content-hash --no-source-maps --public-url ./",
        "build": "npm run clean && npm run build:parcel"
    },
    "keywords": [],
    "license": "MIT",
    "devDependencies": {
        "@parcel/transformer-sass": "^2.16.0",
        "parcel": "^2.16.0"
    }
}
The most important line is:
start": "parcel src/index.html --open",You can now run:
npm run startwhich will open a new development server on http://localhost:1234/
2/ HTML base
Now let’s setup the HTML: Inside your index.html, create a basic html structure, but see how we are importing our local style.scss file. Make sure you add type=”module” on the js import, since we are going to use the ES module syntax (with import)
<!DOCTYPE html>
<html lang="en">

<head>
    <meta charset="UTF-8">
    <meta name="viewport" content="width=device-width, initial-scale=1.0">
    <title>Bling Game</title>

    <!-- Direct scss link with Parcel -->
    <link rel="stylesheet" href="./scss/style.scss" />
</head>

<body>

    <div class="container">

    </div>

    <script src="./js/index.js" type="module"></script>
</body>

</html>
The structure of the game (HTML-CSS)
1/ The HTML
Let’s create the playground. The HTML is straightforward:
We are using the BEM methodology for the classes.
The grid will eventually be generated dynamically with JavaScript, but for now we’ll keep one circle in the markup to test the CSS and variables.
<div class="container">
    <h1>The Color Game</h1>
    <button class="btn start-button">Start</button>
    <div class="restart-modal is-hidden">
        <div>You loose</div>
        <button class="btn btn--reverse restart-button">Play Again</button>
    </div>
    <div class="game-container">
        <div class="level">Level: <span>0</span></div>
        <div class="color-grid">
            <!-- For test only, remove later -->
            <div class="color-grid__circle"></div>
            <div class="color-grid__circle color-wrong"></div>
        </div>
    </div>
</div>
2/ The CSS
The css is a bit more complex. First, define our CSS variables:
:root {
    /*updated in JS */
    --circle-color-h: 0; /* 0 to 360 */
    --circle-color-opacity: 15; /* 50: easy (black) / 0: hard */
    --circle-column-number: 3;
    --circle-animation-delay: 0.02s;

    /* fix variables */
    --circle-color-l: 50%;
    --circle-color-hsl: hsl(var(--circle-color-h), 50%, var(--circle-color-l));
    --circle-color-hsl-darker: hsl(
        var(--circle-color-h),
        50%,
        calc(var(--circle-color-l) - var(--circle-color-opacity) * 1%)
    );
    --circle-color-hsl-lighter: hsl(
        var(--circle-color-h),
        50%,
        calc(var(--circle-color-l) + var(--circle-color-opacity) * 1%)
    );
}
All the variables marked as updated in JS will be controlled by our JS code.
The others are helper variables used only inside the CSS.
A quick explanation on HSL
For the color, we are going to use HSL instead of RGB, because it’s easier to change in our case. We will update the lightness of the wrong color.
- Hue: a color between 0 and 360. Will be generated randomly in the JS
- Saturation: 50% (0 is grey, 100 is super saturated)
- Lightness: Will be used to make a wrong color. The base will be 50%. The more the number is close to 50, the hardest it is.
We also define a few other variables, like the number of columns in a CSS variable so we can update the grid size dynamically.
3/ The Grid and Circles
The circles are arranged using CSS Grid.
The number of rows and columns will be controlled by our CSS variables (and therefore by JavaScript later):
.color-grid {
    width: 300px;
    height: 300px;
    flex-shrink: 0;

    display: grid;
    grid-template-rows: repeat(var(--circle-column-number), 1fr);
    grid-template-columns: repeat(var(--circle-column-number), 1fr);

    align-items: center;
    justify-items: center;
}
For the circles, here is how we define the css variables:
.color-grid__circle {
    width: 80%;
    height: 80%;
    border-radius: 50%;
    cursor: pointer;
    background-color: var(--circle-color-hsl);
    &.color-wrong {
        background: var(--circle-color-hsl-darker);
    }
}
This ensures that each circle has the base color, and that the special “wrong” circle uses either the darker or lighter variant depending on how you configure it
The Game Logic (JavaScript)
1/ The base
Now that our HTML and CSS is ready, we can start implementing the game logic. We are going to use ES6 class for this project.
First, let’s create a Color-Game.js file, and create the structure of the file.
class ColorGame {

    constructor() {}

    init() {

    }

}
export default BlingGame;
It’s empty for now, we just defined the name of the class, the constructor, and an empty init() method.
We can now import it on our index.js:
import BlingGame from './Bling-Game';

const blindGame = new BlingGame();
blindGame.init();
This creates a new instance of the class and calls its init() method.
This is the only method called from index.js, which will not change again
2/ The class
Inside Color-Game.js, let’s define our default fields and DOM element:
class BlingGame {
    defaultOpacity = 10; //50: easy (black) / 0: hard (equivalent to opacity)
    cssRoot = document.documentElement;
    opacity = this.defaultOpacity;
    currenLevel = 0;
    columns;

    constructor() {}

    init() {
        this.initDomElements();
    }

    initDomElements() {
        this.circleElem = document.createElement("div");
        this.circleElem.classList.add("color-grid__circle");

        this.$startButton = document.querySelector(".start-button");
        this.$restartButton = document.querySelector(".restart-button");
        this.$restartModal = document.querySelector(".restart-modal");
        this.$gameContainer = document.querySelector(".game-container");
    }
}
In init(), we call the initDomElements method, which simply stores all DOM references that we’ll reuse later.
We need to launch the game. Let’s add a click event listener in the init() method:
this.$startButton.addEventListener('click', this.startGame.bind(this));And create the startGame method:
startGame() {
        this.currenLevel = 0;
        this.columns = 3;
        this.setLevel(0);
        this.setCssColumn();
}
As you can see, we are initializing
- the current level to 0
- the number of columns to 3.
3/ Dynamic styles and grid
The method setCssColumn will just update the CSS variable –circle-column-number based on the columns number:
setCssColumn() {
        this.cssRoot.style.setProperty("--circle-column-number", this.columns);
    }
Let’s set our methods for the other CSS variables (random color, and opacity):
setCssColor() {
        const randomColorH = Math.floor(Math.random() * 361);
        this.cssRoot.style.setProperty("--circle-color-h", randomColorH);
    }
    setCssOpacity(op) {
        this.cssRoot.style.setProperty("--circle-color-opacity", op);
    }
The great advantage is that we don’t have to set any styles on our file. Everything will be updated through our CSS variables.
4/ Managing levels
The setLevel method will be called each time we increase a level (or in this case, on initializing), and will have the game logic in terms of levels, points etc…
setLevel(level) {
        this.setCssColor();

        //update opacity every 2 levels
        if (level > 0 && this.opacity > 5 && level % 2 === 0) {
            this.opacity--;
            this.setCssOpacity(this.opacity);
        }
        // update number of colmuns every 15 levels. Level 61 => max of 7 columns
        if (level > 0 && level < 61 && level % 15 === 0) {
            this.opacity = this.defaultOpacity; //set back to default
            this.columns++;
            this.setCssColumn();
        }
        this.addGridCells();
        this.updateWrongCircle();
        document.querySelector(".level span").innerText = level;
    }
- level % 2 === 0 means the level variable is a multiple of 2
- We will have a max grid size of 7×7. The main reason is animation performance. Animating a large number of items may lead to rendering issues.
Note that we always update our CSS variables through previously created methods setCssOpacity and setCssColumn. This means that even when the number of row and column increase, the way it’s displayed is also updated in our CSS.
We are also changing the DOM to show the new level, with the innerText property.
2 new methods are called here: addGridCells and udpdateWrongCircle.
addGridCells is called to generate the grid. Our HTML is empty, so we need to create all the elements:
addGridCells() {
        const multiplier = this.columns * this.columns;

        // Remove existing grid elems everytime we change level
        this.circleListNode.forEach((elem) => {
            document.querySelector(".color-grid").removeChild(elem);
        });

        this.circleListNode = [];
        for (let i = 0; i < multiplier; i++) {
            const clone = this.circleElem.cloneNode(true);
            this.circleListNode.push(clone);
            document.querySelector(".color-grid").appendChild(clone);
        }
    }
Note that this method will rebuild the game every time. This is done to easily manage the event listeners that we will add later, especially when adding/removing new columns and row.
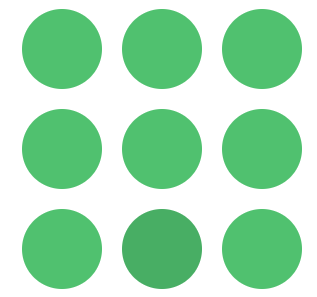
You should have this:

And now the wrong color:
- Get a random number from our circle
- Add the .color-wrong class to the corresponding one
Note that we update our field currentWrongCircleNumber which will be used later
updateWrongCircle() {
        this.currentWrongCircleNumber = Math.floor(Math.random() * this.circleListNode.length);
        this.circleListNode[this.currentWrongCircleNumber].classList.add("color-wrong");
    }
And you should get this:
Game interactions
We have our grid displayed, but nothing is clickable yet.
Let’s create a method to add a click event listener on each circle:
initCircleElement() {
        const circleElems = document.querySelectorAll(".color-grid__circle");
        circleElems.forEach((elem, index) => {
            elem.addEventListener("click", this.onClickCircle.bind(this));
            elem.clickedIndex = index;
        });
    }
Every time a circle is clicked, we call the method onClickCircle:
- Clicking the correct circle increases the level, regenerates the grid, and reinitializes event listeners.
- Clicking the wrong circle triggers a loss (we’ll add a timer or modal later).
Because we remove and recreate circle elements on every level, previously attached listeners could persist and cause unexpected behavior.
We need a method to remove them first:
onClickCircle(e) {
        const clickedIndex = e.currentTarget.clickedIndex;

        if (clickedIndex == this.currentWrongCircleNumber) {
            // if click on correct element, reinit
            this.currenLevel++;
            this.setLevel(this.currenLevel);
            this.initCircleElement();
        } else {
            console.log(“you lose”)
        }
    }
However, we have an issue here. We previously add event listeners to some DOM element, but those DOM elements have been removed. It means that our event listeners are still… listening. Even if this shouldn’t have any impact here, let’s make sure we remove those event listeners. In some case, this must add some wrong behavior to our application, and slow it down.
The method:
removeEventListeners() {
        const circleElems = document.querySelectorAll(".color-grid__circle");

        circleElems.forEach((elem) => {
            elem.removeEventListener("click", this.onClickCircle.bind(this));
        });
    }
And let’s call it just before we delete our circles DOM elements
addGridCells() {
        const multiplier = this.columns * this.columns;

        // Remove existing grid elems everytime we change level
        this.removeEventListeners();
        this.circleListNode.forEach((elem) => {
            document.querySelector(".color-grid").removeChild(elem);
        });

        //... rest of the method
    }
And… that’s it! You can now play the game!
You should have something similar to this:
However, the game can still be improved, by adding some nice animations, and a time.
And also, you can add a timer as we saw in a previous article!
If you don’t want to wait, you can still have a look to the sources on the GitHub or the Codepen projects to have the entire code.
Hope you enjoyed this tutorial, see you soon!